Microphone-Parts MXL 990 Kit

Microphone-Parts Advanced Mod Kit for MXL 990
Wednesday, March 27, 2013
Ever wonder what really top shelf cost-no-object parts do for a mic? What you get when a mic guru picks his favorite semiconductors, caps, resistors, etc. and tweaks a circuit? A collaboration between well-known upgrader Jim Williams and Matt McGlynn of Microphone-Parts.com has made it possible to find out at home. Jim provided the expertise and Matt has gathered all the parts together, tracked down some of the hard to find bits, and written a how-to-manual. The kit isn’t cheap at $99, but then your time searching for small parts, ordering from multiple vendors, dealing with minimum orders, and trying out alternatives to see which sound best is worth something. In this case, I’d already modified my 990s, replacing the capacitors which held them back, but I was curious if a wholesale makeover is worthwhile.
So just how much difference do top-grade parts make in a mic?
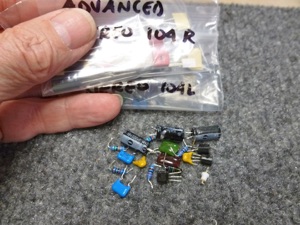
I’m not going to tell you what’s in the kit in detail. Jim and Matt have an investment here. Let’s just say they replace everything except the bias oscillator with new parts. Resistors are Dale 1% precision parts, Wima film capacitors, and Hitachi and Siliconix transistors further matched by hand not only within each mic, but across pairs of mics if you order stereo kits. Add a nice capsule, and you have a high-end mic inside the MXL shell.
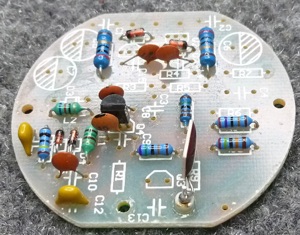
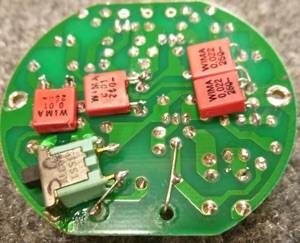
Here’s the parts removed from one mic in preparation for rebuilding.
I didn’t follow the kit religiously. I used most of the kit parts but deviated here and there to suit personal preferences. The manual is easy to follow, mostly using color photos to show which parts to place where. Figure a couple of hours for the first board to remove all the parts then scrub it clean (something MXL doesn’t always do very well) and another hour to install the upgraded components. A second mic will go faster, but give yourself a day and don’t rush. After all, a sloppy board will negate the purpose of the exercise.

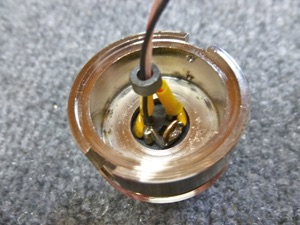
One change I made which isn’t addressed in the kit is RF suppression. I moved the small bypass caps down onto the XLR connector itself and added a ferrite bead around the wires. Not a problem unless the mic is used around a radio transmitter, but I have had to work in RF fields strong enough to light a fluorescent tube once or twice in my career. As long as I’m tinkering...
Since I’m swapping MXL’s capsule for one of MP’s RK-12 capsules, I added a tiny switch under the PCB to switch from cardioid to omni pattern.
I also took it upon myself to attack leakage from the bias oscillator into the mic circuit. The 2.4 MHz bias frequency won’t pass through the output stage, but it does get into the first stage FET to its detriment.
So. How does the old vs new stack up?
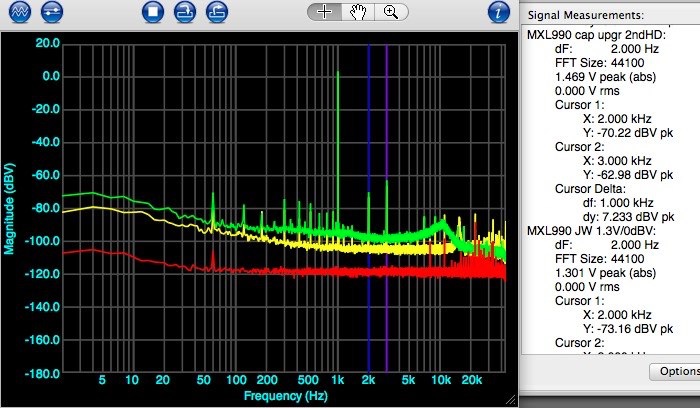
Here’s the mic’s noise and distortion with a very loud 1KHz sine wave output, just approaching clipping. Third harmonic 0.08% is rising above second and odd harmonics are popping up. Green is with capacitors upgraded but otherwise stock. Yellow is with the kit parts installed and red is the noise floor of the TASCAM US-144mkII interface at 88.2 KHz / 24 bits. You’ll have to ignore the 60 Hz hum and its harmonics. The mic case had to be open to inject the test signals, and the best shielding I could come up with still had to be slightly open to get wires in.
The noise floor is down 6-10 dB, and distortion is down by an additional 3 or 4 dB. A noise peak at 10 KHz has shifted up to 15 KHz. This is with the stock capsule, and the peak shift is probably the result of a lower input capacitance in the upgraded circuit, which should improve transient response. The circuit is changed as well as better parts substituted.
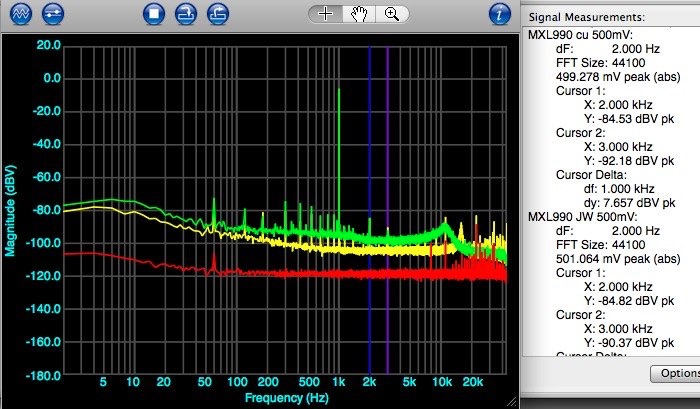
Here’s another measurement taken at 500 mV p/p output, still a very loud signal. distortion is mostly second harmonic. As level is reduced below this, the second and third harmonics disappear entirely. This circuit is very clean and undistorted at normal mic levels. If you’re looking for a little transformer distortion and harmonic embellishment, you may prefer other mics. (Toobz...)
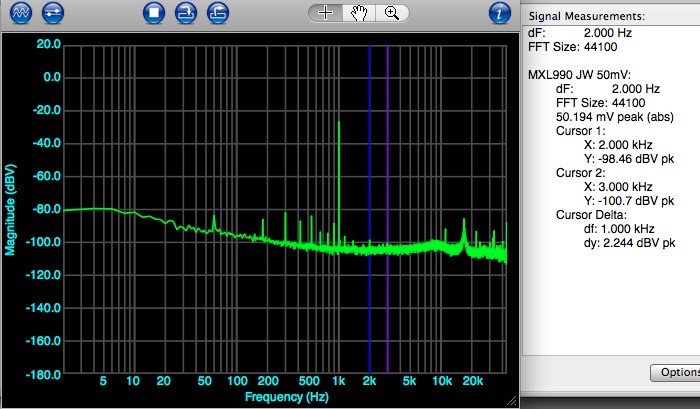
At 50 mV output, a normal mic level, all we see is the 1KHz test tone, harmonics of 60 cycle buzz, and artifacts of the interface’s phantom power oscillator above 10 KHz. When the large capsule is installed, this becomes a very quiet, clean microphone.
So yes, top notch components do make a difference. MXL’s economy parts measure pretty well, but you can pull more out of the circuit. The Microphone Parts kit makes an effective upgrade pretty much a no-brainer. The hard work and cut-and-try development has been done for you. The manual guides you step by step. If you know how to solder, you can do it yourself.

